The Secure Sockets Layer (SSL) is a commonly-used protocol for managing the security of a message transmission on the Internet. SSL has recently been succeeded by Transport Layer Security (TLS), which is based on SSL. SSL uses a program layer located between the Internet's Hypertext Transfer Protocol (HTTP) and Transport Control Protocol (TCP) layers.
Why Use SSL ?
Secure Sockets Layer (SSL) is a message transportation protocol that provides the following
Advantages of SSLAuthenticated:- The origin of all messages is assured.
Reliable:-The message transport uses a message integrity check (using a MAC) that ensures the quality of the data being transmitted.
Private:-Messages between the components are encrypted, after a handshake to define a secret key. This ensures that the contents of the messages cannot be read by a third party. If all of your components are behind a firewall, or some other means of protection, and do not require encryption, privacy can be disabled without comprising the authentication and reliability aspects of SSL.
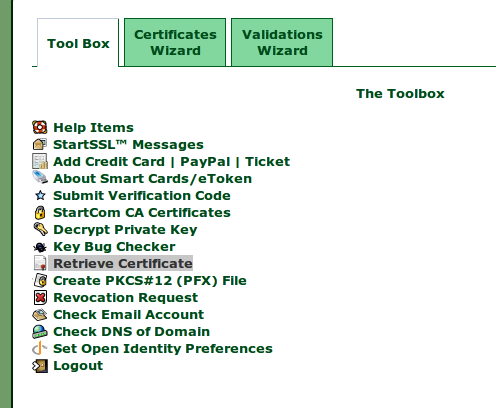
:: 0x02 Starting to Setup up SSL ::
Things required ssh with root access (For this Tutorial) Apache web server (I’m using apache, slightly different method for others)
An Account at http://www.startssl.com (Sign up for the free one)
Let’s Start,Generating RSA Private key
Install & enable OpenSSL (sudo apt-get install openssl / yum install openssl & then sudo a2enmod ssl
; sudo /etc/init.d/apache2 force-reload)
Then to generate the key, give this command.
# openssl genrsa -des3 -out www.cybershubham.com.key 1024
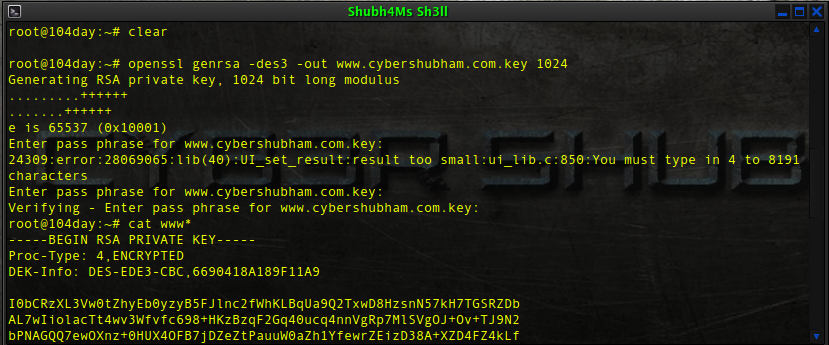
The key will be generate now, and will be saved as www.cybershubham.com.key.
Generating CSR (Certificate Signing Request)
Using the key generate above, you should generate a certificate request file (csr) using openssl as shown below with following command.
# openssl req -new -key www.cybershubham.com.key -out www.cybershubham.com.csr
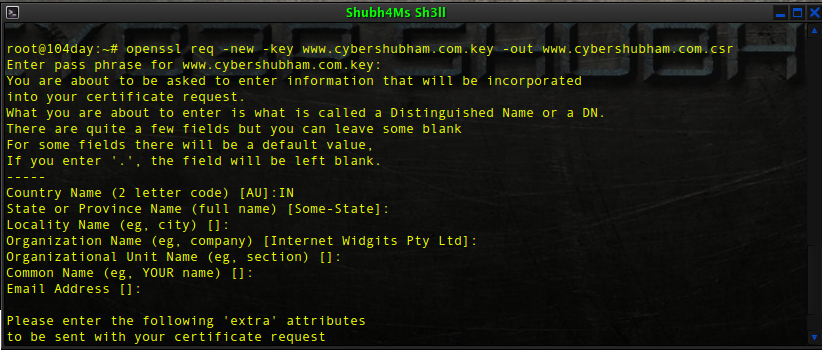 The csr will generate now, & will be saved as www.cybershubham.com.csr :: 0x03 Getting a Valid Signed Certificate ::
Hope you have already registered at StartSSL, & validated your domain name.So let’s go forward,
:: 0x03 Getting a Valid Signed Certificate ::
Hope you have already registered at StartSSL, & validated your domain name.So let’s go forward,
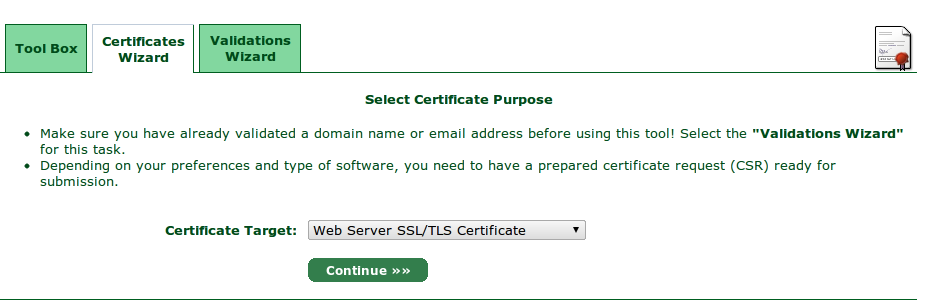
Select Certificate Purpose
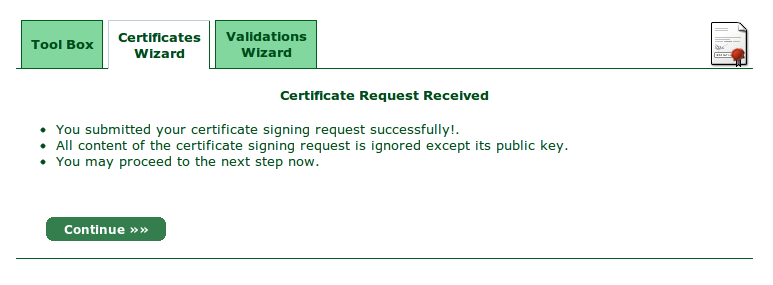
Submit CSR
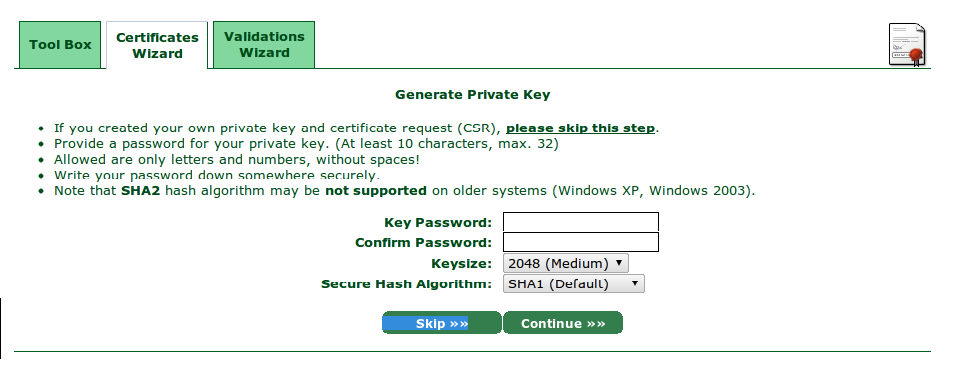
Skip the above screen & move forward, as we have already generated the CSR & Key.
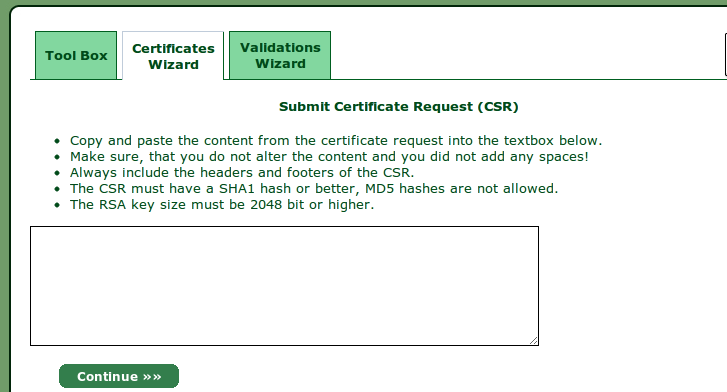
Paste your CSR here & click continue.
Click continue.
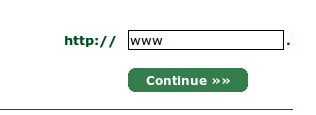
Selecting Sub Domain
As for the basic free certificate, we don’t get certificate for all our sub domains. you want ssl for your main website. just put www.
Follow the rest 1-2 steps, they are easy.
Retrieve Chain File
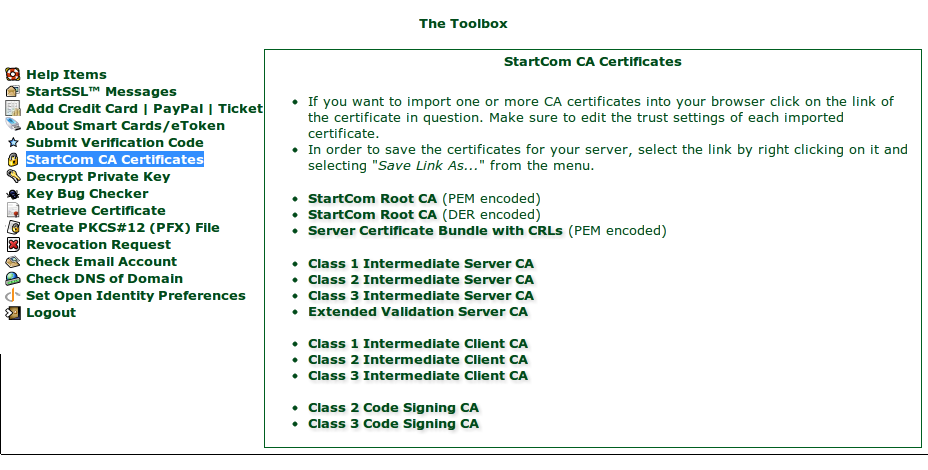
Download the StartCom Root CA (PEM encoded file).
:: 0x04 Configuring Web Server ::
Every web server has different configuration, I’ll tell you how to configure apache.
Step 1- Gather all files- the key file(www.cybershubham.com.key) , The retrieved certificate file (www.cybershubham.com.crt) , the Chain file (CA.pem)
Step 2-
# cd /etc/apache2
# mkdir ssl
Step 3-
Upload all files in the ssl directory with ftp or simply use nano command in ssh.
Step 4-
# cd /etc/apache2
# cd sites-available
# nano default-ssl
Most important part, but quite easy just set the write path to files. like this-
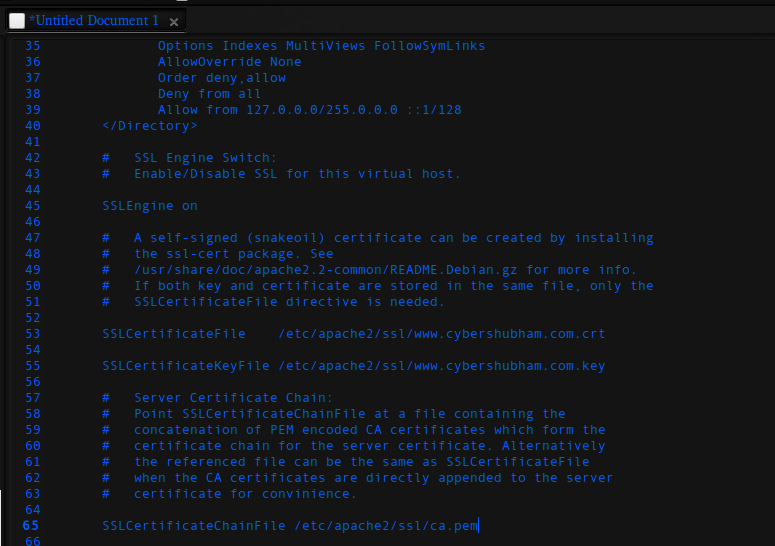
Step 5- Configure ports
# cd /etc/apache2
# nano ports.conf
simply add "listen 443” after listen 80 line. (without quotes)
Step 6- Restarting Apache
# /etc/init.d/apache2 reload
# /etc/init.d/apache2 restart
Now you are done !!! Just open https://www.cybershubham.com to check if it works ;)
Step 7- Make https default
# cd /var/www/cybershubham.com/web/
# nano .htaccess
Paste the following content now -
RewriteEngine On
RewriteCond %{SERVER_PORT} 80
RewriteRule ^(.*)$ https://www.cybershubham.com/$1 [R,L]
Now all users will land on https :),Hope you liked the post.